Tác giá: Norm Johanson
Ngày đăng: ngày 04 tháng 3 năm 2025
Danh mục: .NET, AWS Lambda
Trong Phần 1 của loạt bài viết về .NET Aspire và AWS Lambda, chúng tôi đã hướng dẫn bạn cách sử dụng .NET Aspire để chạy và debug các hàm .NET Lambda.
Trong Phần 2 này, chúng tôi sẽ hướng dẫn cách tận dụng mô hình lập trình của .NET Aspire để áp dụng best practices và kết nối các tài nguyên phụ thuộc như lớp cache và datastore. Chúng tôi cũng sẽ chỉ bạn cách sử dụng OpenTelemetry để thu thập dữ liệu telemetry từ ứng dụng, dữ liệu này có thể được xem trực tiếp trong .NET Aspire dashboard.
Starting Code
Đoạn mã dưới đây minh họa cách một lập trình viên .NET có thể viết logic để truy xuất tài khoản từ một datastore có sử dụng cache.Trong ví dụ này, chúng ta nhận account ID từ đường dẫn tài nguyên, tìm trong cache Redis, nếu không thấy thì sẽ truy vấn từ datastore (trong trường hợp này là Amazon DynamoDB). Khi lấy được dữ liệu từ datastore, mã nguồn sẽ ghi dữ liệu đó vào Redis cache cho các lần truy xuất tiếp theo.
var ddbContext = _host.Services.GetRequiredService<DynamoDBContext>();

var redis = _host.Services.GetRequiredService<IConnectionMultiplexer>().GetDatabase();

var id = request.PathParameters["id"];

context.Logger.LogInformation("Attempting to load account {id}", id);

Accounts account;

var accountJson = redis.StringGet(id);
if (!string.IsNullOrEmpty(accountJson))
{
    context.Logger.LogDebug("Loaded account from redis cache");
    account = JsonSerializer.Deserialize<Accounts>(accountJson);
} else {
    context.Logger.LogDebug("Loaded account from DynamoDB");
    account = await ddbContext.LoadAsync<Accounts>(id);
    accountJson = JsonSerializer.Serialize(account);
    if (redis.StringSet(id, JsonSerializer.Serialize(account)))
    {
        context.Logger.LogDebug("Saved account {id} to redis cache", id);
    }
}

var response = new APIGatewayHttpApiV2ProxyResponse
{
    StatusCode = 200,
    Headers = new Dictionary<string, string>
    {
        {"Content-Type", "application/json" }
    },
    Body = accountJson
};
return response;
Logic trên đã được đơn giản hóa để trình bày, nhưng nó thể hiện những thách thức khi làm việc với các tài nguyên phụ thuộc bên ngoài trong quá trình chạy và debug hàm .NET Lambda. Khi triển khai hàm lên AWS Lambda, hàm sẽ sử dụng dịch vụ DynamoDB thực tế và cung cấp (provision) một cụm Redis bằng Amazon ElastiCache. Tuy nhiên, khi chạy trong môi trường phát triển, làm thế nào để chúng ta kết nối các tài nguyên phụ thuộc đó? Chúng ta không muốn mã nguồn phải thay đổi tùy thuộc vào việc nó đang chạy cục bộ hay đã được triển khai. Đây chính là lúc mô hình lập trình của .NET Aspire có thể thay đổi cách chúng ta xây dựng các hàm .NET Lambda.
Thiết lập OpenTelemetry
Sử dụng OpenTelemetry trong các dự án .NET, bao gồm cả .NET Lambda, giúp bạn có cái nhìn sâu sắc về hoạt động của ứng dụng trên toàn bộ các thành phần.
.NET Aspire hướng đến việc đơn giản hóa quá trình bật OpenTelemetry cho ứng dụng .NET.
Mô hình phổ biến cho các ứng dụng .NET Aspire là sử dụng một project “service defaults”. Project này chứa một tập hợp các phương thức mở rộng (extension methods) mà bạn có thể dùng để thiết lập các cấu hình chung và các phương pháp hay nhất (best practices), bao gồm cả việc kích hoạt OpenTelemetry trên toàn bộ các project .NET trong ứng dụng .NET Aspire của bạn.
Để thêm service defaults project vào solution, chọn:
Add -> New Project…
sau đó chọn template “.NET Aspire Service Defaults”
Theo quy ước chung, đặt tên cho project là:
<solution-name>.ServiceDefaults.
Để bật OpenTelemetry tracing cho các thành phần AWS và Redis của chúng ta, hãy thêm các package sau vào dự án service defaults:
- OpenTelemetry.Instrumentation.AWS – Để instrument (đo lường/ghi nhận) AWS SDK for .NET.
- OpenTelemetry.Instrumentation.AWSLambda – Để instrument các hàm .NET Lambda, bao gồm việc tạo ra trace bao quát (overarching trace) cho mỗi lượt gọi hàm (Lambda invocation).
- OpenTelemetry.Instrumentation.StackExchangeRedis – Để instrument các truy cập đến Redis. Lưu ý rằng tại thời điểm viết bài này, package này đang được đánh dấu là bản preview với phiên bản 1.11.0-beta.1.
Tiếp theo, chúng ta cần bật các package này trong phương thức
ConfigureOpenTelemetry được tìm thấy trong file Extensions.cs.
public static TBuilder ConfigureOpenTelemetry<TBuilder>(this TBuilder builder) where TBuilder : IHostApplicationBuilder
{
    builder.Logging.AddOpenTelemetry(logging =>
    {
        logging.IncludeFormattedMessage = true;
        logging.IncludeScopes = true;
    });

    builder.Services.AddOpenTelemetry()
        .WithMetrics(metrics =>
        {
            metrics.AddAspNetCoreInstrumentation()
                .AddHttpClientInstrumentation()

                // Add AWS metrics
                .AddAWSInstrumentation()
                .AddRuntimeInstrumentation();
        })
        .WithTracing(tracing =>
        {
            tracing.AddSource(builder.Environment.ApplicationName)
                .AddAspNetCoreInstrumentation()

                // Add Redis instrumentation
                .AddRedisInstrumentation()

                // Add AWS traces and Lambda configuration
                .AddAWSInstrumentation()
                .AddAWSLambdaConfigurations(options => options.DisableAwsXRayContextExtraction = true)
                .AddHttpClientInstrumentation();
        });
    builder.AddOpenTelemetryExporters();
    return builder;
}
Để một .NET Lambda function có thể sử dụng các service defaults extension methods, nó cần có một project reference đến service defaults project, và cần cấu hình các services mà nó sử dụng thông qua một IHostApplicationBuilder builder. Trong constructor của đoạn mã dưới đây, HostApplicationBuilder được sử dụng để xây dựng dependency injection container, và phương thức AddServiceDefaults extension method được gọi để thêm các thiết lập chung (common settings), bao gồm cả cấu hình OpenTelemetry mà chúng ta đã thực hiện.
public class Functions
{
    IHost _host;
    TracerProvider _traceProvider;
    public Functions()
    {
        var builder = new HostApplicationBuilder();

        // Call the AddServiceDefaults method from the shared service defaults project.
        builder.AddServiceDefaults();
        builder.AddRedisClient(connectionName: "cache");
        builder.Services.AddAWSService<IAmazonDynamoDB>();
        builder.Services.AddSingleton<DynamoDBContext>(sp =>
        {
            return new DynamoDBContext(sp.GetRequiredService<IAmazonDynamoDB>(), new DynamoDBContextConfig
            {
                DisableFetchingTableMetadata = true
            });
        });
        _host = builder.Build();
        _traceProvider = _host.Services.GetRequiredService<TracerProvider>();
    }
    ...
Tất cả các hoạt động mạng đang được thực hiện từ hàm Lambda, chẳng hạn như tiếp cận với DynamoDB và Redis, phải được bao bọc trong một dấu vết OpenTelemetry mẹ. Điều này cho phép chúng ta xem, đối với lệnh gọi Lambda, thời gian đang được sử dụng và vị trí của các khu vực có khả năng bị lỗi. Để tạo dấu vết cho lệnh gọi Lambda, hãy sử dụng phương thức từ gói OpenTelemetry.Instrumentation.AWSLambda NuGet package.
public Task<APIGatewayHttpApiV2ProxyResponse> GetAccountAsync(APIGatewayHttpApiV2ProxyRequest request, ILambdaContext context)
        => AWSLambdaWrapper.TraceAsync(_traceProvider, async (request, context) =>
        {
            var ddbContext = _host.Services.GetRequiredService<DynamoDBContext>();
            var redis = _host.Services.GetRequiredService<IConnectionMultiplexer>().GetDatabase();
            var id = request.PathParameters["id"];
            context.Logger.LogInformation("Attempting to load account {id}", id);
            Accounts account;
            var accountJson = redis.StringGet(id);
            if (!string.IsNullOrEmpty(accountJson))
            {
                context.Logger.LogDebug("Loaded account from redis cache");
                account = JsonSerializer.Deserialize<Accounts>(accountJson);
            } else {
                context.Logger.LogDebug("Loaded account from DynamoDB");
                account = await ddbContext.LoadAsync<Accounts>(id);
                accountJson = JsonSerializer.Serialize(account);
                if (redis.StringSet(id, JsonSerializer.Serialize(account)))
                {
                    context.Logger.LogDebug("Saved account {id} to redis cache", id);
                }
            }
            var response = new APIGatewayHttpApiV2ProxyResponse
            {
                StatusCode = 200,
                Headers = new Dictionary<string, string>
                {
                    {"Content-Type", "application/json" }
                },
                Body = accountJson
            };
            return response;
        }, request, context);

[DynamoDBTable("Accounts")]
public class Accounts
{
    [DynamoDBHashKey("Id")]
    public string Id { get; set; }
    public string Name { get; set; }
    public string Address { get; set; }
}
Những thay đổi được thực hiện đối với hàm Lambda để sử dụng OpenTelemetry cũng chính là những thay đổi cần thiết khi chạy trong dịch vụ Lambda thực tế hoặc trong .NET Aspire. Không có phần nào trong mã của hàm Lambda ràng buộc nó với .NET Aspire hay trải nghiệm cục bộ.
Thiết lập vòng lặp phát triển nội bộ (developer inner loop)
Trong previous blog, chúng tôi đã hướng dẫn bạn cách sử dụng máy chủ ứng dụng .NET Aspire để điều phối ứng dụng chạy cục bộ. Đối với hàm Lambda, chúng ta cần điều phối quyền truy cập vào phiên bản Redis và DynamoDB bằng bảng Tài khoản. Đối với DynamoDB, chúng ta có thể chọn cung cấp bảng Tài khoản trong DynamoDB hoặc sử dụng DynamoDB cục bộ. Đối với hướng dẫn này, chúng ta sẽ sử dụng DynamoDB cục bộ.
Để bắt đầu, hãy thêm các gói sau vào máy chủ ứng dụng .NET Aspire:
Trong , thêm tài nguyên Redis và DynamoDB. Các phương pháp mở rộng này đảm nhận việc khởi động các hình ảnh bộ chứa cơ bản cho phiên bản .NET Aspire.Program.cs
var builder = DistributedApplication.CreateBuilder(args);
var cache = builder.AddRedis("cache");
var dynamoDbLocal = builder.AddAWSDynamoDBLocal("DynamoDBAccounts");
Tại thời điểm này, chúng ta đã có một instance của DynamoDB local đang chạy, nhưng nó chưa có bất kỳ bảng (table) hoặc dữ liệu nào.
Hãy sử dụng đoạn mã sau để tạo bảng “Accounts” và khởi tạo (seed) một tài khoản mẫu trong bảng. Phần mã nằm trong phương thức Subscribe sẽ được gọi ngay sau khi container DynamoDB local báo hiệu rằng nó đã sẵn sàng (ready state).
// Seed the DynamoDB local instance once the resource is ready.
builder.Eventing.Subscribe<ResourceReadyEvent>(dynamoDbLocal.Resource, async (evnt, ct) =>
{
    // Configure DynamoDB service client to connect to DynamoDB local.
    var serviceUrl = dynamoDbLocal.Resource.GetEndpoint("http").Url;
    var ddbClient = new AmazonDynamoDBClient(new AmazonDynamoDBConfig { ServiceURL = serviceUrl });

    // Create the Accounts table.
    await ddbClient.CreateTableAsync(new CreateTableRequest
    {
        TableName = "Accounts",
        AttributeDefinitions = new List<AttributeDefinition>
        {
            new AttributeDefinition { AttributeName = "Id", AttributeType = "S" }
        },
        KeySchema = new List<KeySchemaElement>
        {
            new KeySchemaElement { AttributeName = "Id", KeyType = "HASH" }
        },
        BillingMode = BillingMode.PAY_PER_REQUEST
    });

    // Add an account to the Accounts table.
    await ddbClient.PutItemAsync(new PutItemRequest
    {
        TableName = "Accounts",
        Item = new Dictionary<string, AttributeValue>
        {
            { "Id", new AttributeValue("1") },
            { "Name", new AttributeValue("Amazon") },
            { "Address", new AttributeValue("Seattle, WA") }
        }
    });
});
Chạy máy chủ ứng dụng .NET Aspire, chúng ta có thể thấy rằng chúng ta đã thêm thành công Redis và DynamoDB cục bộ vào ứng dụng .NET Aspire của mình. Nhiệm vụ tiếp theo chúng ta cần làm là cấu hình hàm Lambda để sử dụng các tài nguyên này.
Trong bài viết blog trước, chúng ta đã nói về việc sử dụng các AddAWSLambdaFunction và AddAWSAPIGatewayEmulator extension methods để thêm một .NET Lambda function như một resource vào ứng dụng .NET Aspire. Hãy nhớ rằng các API này được đánh dấu là preview, vì vậy để sử dụng chúng, bạn cần bao gồm #pragma như được hiển thị trong đoạn mã bên dưới.
Đoạn mã này sử dụng các phương thức trên để thêm Lambda function và cấu hình quyền truy cập thông qua Amazon API Gateway endpoint.
Để kết nối function với các Redis và DynamoDB resources, phương thức WithReference được sử dụng.
Phương thức WithReference cho DynamoDB local resource sẽ ghi đè endpoint mà DynamoDB service client tạo ra trong Lambda function. Phương thức WithReference cho Redis resource sẽ thêm connection string vào Lambda function. Dòng lệnh builder.AddRedisClient(connectionName: "cache") trong Lambda function (được trình bày ở phần trước của bài viết này) sẽ tìm connection string và sử dụng nó.
#pragma warning disable CA2252 // Opt-in for preview features.

var getAccountFunction = builder.AddAWSLambdaFunction<Projects.AccountManagement>(
                                    name: "GetAccountFunction",
                                    lambdaHandler: "AccountManagement::AccountManagement.Functions::GetAccountAsync",
                                    options: new LambdaFunctionOptions
                                    {
                                        ApplicationLogLevel = ApplicationLogLevel.DEBUG
                                    })
                                .WithReference(dynamoDbLocal)
                                .WaitFor(dynamoDbLocal)
                                .WithReference(cache)
                                .WaitFor(cache);

builder.AddAWSAPIGatewayEmulator("APIGatewayEmulator", APIGatewayType.HttpV2)
        .WithReference(getAccountFunction, Method.Get, "/account/{id}");
Tại thời điểm này, vòng lặp bên trong dành cho nhà phát triển được thiết lập để khi chúng ta khởi chạy máy chủ ứng dụng, vùng chứa Redis, DynamoDB cục bộ và hàm .NET Lambda đều được khởi chạy và kết nối. Để tham khảo, đây là mã đầy đủ của máy chủ ứng dụng.
using Amazon.DynamoDBv2;
using Amazon.DynamoDBv2.Model;
using Amazon.Lambda;
using Aspire.Hosting.AWS.Lambda;
var builder = DistributedApplication.CreateBuilder(args);
var cache = builder.AddRedis("cache");
var dynamoDbLocal = builder.AddAWSDynamoDBLocal("DynamoDBAccounts");

// Seed the DynamoDB local instance once the resource is ready.
builder.Eventing.Subscribe<ResourceReadyEvent>(dynamoDbLocal.Resource, async (evnt, ct) =>

{

    // Configure DynamoDB service client to connect to DynamoDB local.
    var serviceUrl = dynamoDbLocal.Resource.GetEndpoint("http").Url;
    var ddbClient = new AmazonDynamoDBClient(new AmazonDynamoDBConfig { ServiceURL = serviceUrl });

    // Create the Accounts table.
    await ddbClient.CreateTableAsync(new CreateTableRequest
    {

        TableName = "Accounts",
        AttributeDefinitions = new List<AttributeDefinition>
        {
            new AttributeDefinition { AttributeName = "Id", AttributeType = "S" }
        },
        KeySchema = new List<KeySchemaElement>
        {
            new KeySchemaElement { AttributeName = "Id", KeyType = "HASH" }
        },
        BillingMode = BillingMode.PAY_PER_REQUEST
    });

    // Add an account to the Accounts table.
    await ddbClient.PutItemAsync(new PutItemRequest
    {
        TableName = "Accounts",
        Item = new Dictionary<string, AttributeValue>
        {
            { "Id", new AttributeValue("1") },
            { "Name", new AttributeValue("Amazon") },
            { "Address", new AttributeValue("Seattle, WA") }
        }
    });
});

#pragma warning disable CA2252 // Opt-in for preview features.
var getAccountFunction = builder.AddAWSLambdaFunction<Projects.AccountManagement>(
                                    name: "GetAccountFunction",
                                    lambdaHandler: "AccountManagement::AccountManagement.Functions::GetAccountAsync",
                                    options: new LambdaFunctionOptions
                                    {
                                        ApplicationLogLevel = ApplicationLogLevel.DEBUG
                                    })
                                .WithReference(dynamoDbLocal)
                                .WaitFor(dynamoDbLocal)
                                .WithReference(cache)
                                .WaitFor(cache);
builder.AddAWSAPIGatewayEmulator("APIGatewayEmulator", APIGatewayType.HttpV2)
        .WithReference(getAccountFunction, Method.Get, "/account/{id}");
builder.Build().Run();
Vận hành trong thực tế
Giờ đây khi .NET Aspire app host đã được thiết lập, hãy cùng xem nó hoạt động. Trong Visual Studio hoặc Visual Studio Code với C# Dev Kit đã cài đặt, hãy khởi chạy dự án app host.
Trên dashboard của .NET Aspire, bạn sẽ thấy tất cả các tài nguyên của chúng ta đang chạy.
Bằng cách xem chi tiết của hàm Lambda, bạn có thể thấy các biến môi trường đã được thiết lập để kết nối container Redis và instance DynamoDB local.

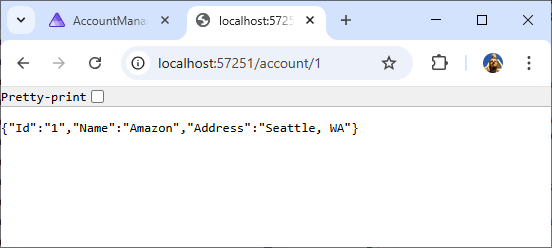
Khi điều hướng đến điểm cuối REST tài khoản GET thông qua trình mô phỏng API Gateway, chúng ta có thể thấy dữ liệu đã được gieo hạt trong DynamoDB cục bộ. Nếu các điểm ngắt được đặt trong hàm Lambda khi chúng ta điều hướng, chúng sẽ được thực hiện. http://localhost:<apigateway-port>/account/1
Quay lại bảng điều khiển .NET Aspire, điều hướng đến phần "Traces" và nhấp vào dấu vết "GetAccountFunction: GetAccountFunction". Dấu vết hiển thị tất cả hoạt động đã được thu thập bởi thiết lập OpenTelemetry đã hoàn thành trước đó.

Nếu chúng ta truy cập lại endpoint GET account, chúng ta sẽ thấy một trace mới, trong đó DynamoDB local đã bị bỏ qua vì dữ liệu đã được cache trong Redis.

Tự động hóa kiểm thử
.NET Aspire cũng có thể được sử dụng cho các bài kiểm tra tích hợp đầu cuối bằng cách sử dụng gói Aspire.Hosting.Testing NuGet. Điều này có nghĩa là chúng ta có thể chạy máy chủ ứng dụng .NET Aspire trong một thử nghiệm, bao gồm tất cả các tài nguyên như Redis và DynamoDB cục bộ như một phần của thử nghiệm. Bạn có thể truy xuất tài nguyên từ máy chủ ứng dụng và kiểm tra.
Bài kiểm thử dưới đây minh họa cách bạn có thể khởi chạy app host và tạo một HttpClient được cấu hình đến API Gateway emulator, để thực hiện các HTTP requests thông qua emulator và gọi (invoke) các Lambda functions.
[Fact]
public async Task GetAccountThroughApiGateway()
{
    var appHost = await DistributedApplicationTestingBuilder.CreateAsync<Projects.AccountManagement_AppHost>();
    await using var app = await appHost.BuildAsync();
    await app.StartAsync();

    var resourceNotificationService = app.Services.GetRequiredService<ResourceNotificationService>();
    await resourceNotificationService
        .WaitForResourceAsync("GetAccountFunction", KnownResourceStates.Running)
        .WaitAsync(TimeSpan.FromSeconds(120));

    using var client = app.CreateHttpClient("APIGatewayEmulator");

    var json = await client.GetStringAsync("/account/1");
    Assert.NotNull(json);
}
Bạn cũng có thể sử dụng AWS SDK for .NET để gọi trực tiếp các hàm Lambda thông qua Lambda emulator. Điều này hữu ích đối với các hàm Lambda không được gọi thông qua API Gateway.
Bài kiểm thử sau minh họa cách bạn có thể tìm endpoint của Lambda emulator, sau đó cấu hình Lambda service client để gọi hàm Lambda.
[Fact]

public async Task GetAccountThroughLambdaSdk()
{
    var appHost = await DistributedApplicationTestingBuilder.CreateAsync<Projects.AccountManagement_AppHost>();
    await using var app = await appHost.BuildAsync();
    await app.StartAsync();
    var resourceNotificationService = app.Services.GetRequiredService<ResourceNotificationService>);
    await resourceNotificationService
        .WaitForResourceAsync("GetAccountFunction", KnownResourceStates.Running)
        .WaitAsync(TimeSpan.FromSeconds(120));
    using var lambdaEndpointClient = app.CreateHttpClient("LambdaServiceEmulator");
    var lambdaConfig = new AmazonLambdaConfig
    {
        ServiceURL = lambdaEndpointClient.BaseAddress!.ToString()
    };

    var lambdaClient = new AmazonLambdaClient(lambdaConfig);
    var invokeRequest = new InvokeRequest

    {
        FunctionName = "GetAccountFunction",
        Payload = CreateGetRequest("1")
    };

    var invokeResponse = await lambdaClient.InvokeAsync(invokeRequest);
    var apiGatewayResponse = JsonSerializer.Deserialize<APIGatewayHttpApiV2ProxyResponse>(invokeResponse.Payload);
    Assert.NotNull(apiGatewayResponse);
    Assert.Equal(200, apiGatewayResponse.StatusCode);
    Assert.NotNull(apiGatewayResponse.Body);
}
Lưu ý, khi định cấu hình cho máy khách dịch vụ Lambda trỏ đến trình giả lập Lambda, thao tác duy nhất trong máy khách dịch vụ Lambda được hỗ trợ là phương thức Gọi. ServiceURL
Kết luận
Sự kết hợp giữa .NET Aspire và các hàm .NET Lambda cho phép điều phối (orchestrate) đơn giản hóa các tài nguyên cần thiết cho vòng lặp phát triển nội bộ (developer inner loop) tại môi trường cục bộ. App host sẽ thiết lập các kết nối để lập trình viên .NET không cần rời khỏi IDE trong quá trình lặp lại và tinh chỉnh mã nguồn. Toàn bộ trải nghiệm (end-to-end experience) có thể được kiểm thử thủ công qua .NET Aspire dashboard hoặc tự động hóa qua các bài kiểm thử tích hợp end-to-end.
Trải nghiệm end-to-end có thể được kiểm thử thủ công thông qua .NET Aspire dashboard hoặc được tự động hóa thông qua các bài kiểm thử tích hợp end-to-end. Việc phát triển tính năng này đang diễn ra tại repository aws/integrations-on-dotnet-aspire-for-aws của chúng tôi. Issue GitHub sau đang được dùng để theo dõi chính cho việc tích hợp Lambda: https://github.com/aws/integrations-on-dotnet-aspire-for-aws/issues/17. Chúng tôi khuyến khích các lập trình viên .NET xây dựng hàm Lambda hãy dùng thử bản preview này và chia sẻ những câu chuyện thành công cũng như bất kỳ vấn đề nào gặp phải với chúng tôi qua repository.
Về các tác giả

Norm Johanson
Norm Johanson là lập trình viên phần mềm với hơn 25 năm kinh nghiệm phát triển mọi loại ứng dụng. Từ năm 2010, anh đã làm việc tại AWS, tập trung vào trải nghiệm phát triển .NET trên AWS.
Twitter: @socketnorm
GitHub: @normj
